Get humhub logged user

First, write a PHP page in your working path.
In my case, D:\humhub\util\bpm\agentflow.php

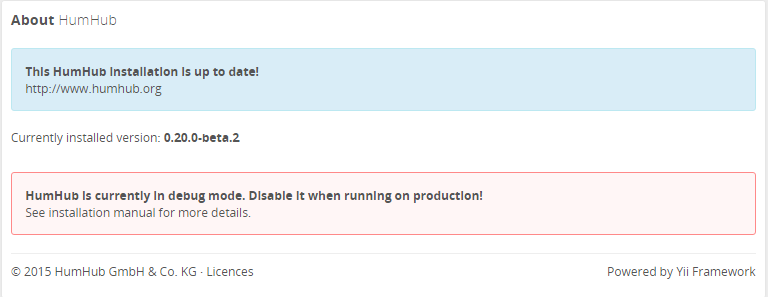
My humhub version is 0.20.0-beta.2  0.20.0


In the PHP page, add the following code


// comment out the following two lines when deployed to production

defined('YII_DEBUG') or define('YII_DEBUG', true);

defined('YII_ENV') or define('YII_ENV', 'dev');


require(__DIR__ . '/../../protected/vendor/autoload.php');

require(__DIR__ . '/../../protected/vendor/yiisoft/yii2/Yii.php');


$config = yii\helpers\ArrayHelper::merge(

    require(__DIR__ . '/../../protected/humhub/config/common.php'),

    require(__DIR__ . '/../../protected/humhub/config/web.php'),

    (is_readable(__DIR__ . '/../../protected/config/dynamic.php')) ? require(__DIR__ . '/../../protected/config/dynamic.php') : [],

    require(__DIR__ . '/../../protected/config/common.php'),

    require(__DIR__ . '/../../protected/config/web.php')

);


new humhub\components\Application($config); // <-- DON'T do run();


Now, you can use Yii object to get the current logged user.

echo  Yii::$app->user->identity->username
I used it to integrate the SSO feature with our BPM platform, Agentflow. With humhub Custon Pages, we can embedded the BPM pages into humhub.


Online chat room using on humhub

今天在 humhub comunity 的 Miscellaneous Board 看到有人介紹一款 online chat room hack.chat
(在 Git-Hub上有專案)

使用方式很簡單,只要連上 https://hack.chat/?your_chatroon_name (自己取一個名字,或者用網站上隨機產生的)

連上之後就會提示您輸入 Nickname

將您建立的chatroom網址轉發出去,就可以線上即時聊天(手機也可以)
雖然介面很陽春,但很容易使用

OK,怎麼將他套用在humhub?

就是透過 Custom Pages


我是先建立了一個HTML網頁,再透過 iFrame Bind進去


這樣就可以隨時揪眾群聊...(大家都用Line好嗎XD)

Create Yii2 project with AdminLTE template

Reference to the URL
Yii2 create project with adminlte basic and advanced easyly

AdminLTE project can be referenced at https://github.com/almasaeed2010/AdminLTE

in Windows, switch to your project folder
1. php composer.phar create-project sintret/yii2-basic --prefer-dist your-folder-directory-name
2. edit config\db.php


return [
    'class' => 'yii\db\Connection',
    'dsn' => 'mysql:host=localhost;dbname=projectname',
    'username' => 'root',
    'password' => '',
    'charset' => 'utf8',
];

3. create db schema in MySQL with your projectname 4. yii migrate
5. yii insert/init
6. yii migrate --migrationPath=@yii/rbac/migrations
7. yii rbac/init
8. edit config\web.php


$params = require(__DIR__ . '/params.php');

$config = [
    'id' => 'sintret-projects',
    'name' => 'Sintret Projects',
    'basePath' => dirname(__DIR__),
    'bootstrap' => ['log'],
    'layout' => 'adminlte',
    'homeUrl' => '/projects',
    'components' => [
        'request' => [
            // !!! insert a secret key in the following (if it is empty) - this is required by cookie validation
            'cookieValidationKey' => 'hQtvUtJQWdasasaeXS5OLnuwiDPkB4ixYwQD',
            'baseUrl' => '/projects',
        ],
        'cache' => [
            'class' => 'yii\caching\FileCache',
        ],
        'user' => [
            'identityClass' => 'app\models\User',
            'enableAutoLogin' => true,
        ],
        'errorHandler' => [
            'errorAction' => 'site/error',
        ],
        'mailer' => [
            'class' => 'yii\swiftmailer\Mailer',
            // send all mails to a file by default. You have to set
            // 'useFileTransport' to false and configure a transport
            // for the mailer to send real emails.
            'useFileTransport' => true,
        ],
        'authManager' => [
            'class' => 'yii\rbac\DbManager', // or use 'yii\rbac\PhPManager'  'yii\rbac\PhPManager'
            'defaultRoles' => ['user'],
        ],
        'util' => [
            'class' => 'app\components\Util',
        ],
        'log' => [
            'traceLevel' => YII_DEBUG ? 3 : 0,
            'targets' => [
                [
                    'class' => 'yii\log\FileTarget',
                    'levels' => ['error', 'warning'],
                ],
            ],
        ],
        'urlManager' => [
            //'enableStrictParsing' => true,
            'class' => 'app\components\SintretUrlManager',
            'enablePrettyUrl' => true,
            'showScriptName' => false,
            'rules' => [
                'logout' => 'site/logout',
                'login' => 'site/login',
                '' => 'site/index',
            //'debug//' => 'debug//',
            ]
        ],
        'db' => require(__DIR__ . '/db.php'),
    ],
    'modules' => [
        'dynagrid' => [
            'class' => '\kartik\dynagrid\Module',
// other module settings
        ],
        'gridview' => [
            'class' => '\kartik\grid\Module',
            // enter optional module parameters below - only if you need to
            // use your own export download action or custom translation
            // message source
            'downloadAction' => 'gridview/export/download',
            'i18n' => [
                'class' => 'yii\i18n\PhpMessageSource',
                'basePath' => '@kvdynagrid/messages',
                'forceTranslation' => true
            ]
        ]
    ],
    'params' => $params,
];

if (YII_ENV_DEV) {
    // configuration adjustments for 'dev' environment
    $config['bootstrap'][] = 'debug';
    $config['modules']['debug'] = 'yii\debug\Module';
    $config['modules']['gii'] = [
        'class' => 'yii\gii\Module',
        'generators' => [
            'sintret' => [
                'class' => 'sintret\gii\generators\crud\Generator',
            ],
            'sintretModel' => [
                'class' => 'sintret\gii\generators\model\Generator'
            ]
        ]
    ];
}

return $config;

Building up Yii2 framework development environment with NetBeans

keep notes on building up Yii2 framework development environment with NetBeans

1. download NetBeans IDE for PHP & install https://netbeans.org/downloads/index.html
2. download nb-yii2-plugin  https://github.com/nbphpcouncil/nb-yii2-plugin/releases/tag/v0.0.3
3. Open NetBeans IDE, goes to Tools > Plugins , switches to Downloaded and press Add Plugins button.
4.select the nbm file downloaded at step 2.and install
5.after install & restart NetBeans IDE, created a new PHP project & choose Yii2 Framework Application, Next & Finish.

6. Complete.


humhub -- The flexible Open Source Social Network Kit

最近試了一套 Open Source Enterprise Social Network Kit -- humhub,雖然名為 Kit,但是功能蠻完整的,符合內部小型社群的需求,而且直接支援Mobile,採用RWD的設計方式。

平台是PHP/Yii framework,採用My SQL作為資料庫,支援AD/LDAP

目前提供的功能有

1.Spaces: 建立小組工作區,可限定成員
2.Stream: FB-like 訊息串,可以按讚(like) & 回覆(comment)
3.Dashboard: 同FB留言板,與自己有關的各種訊息彙整
4.Task: 可記錄工作事項,也可以指派工作給小組成員,可回覆進度與討論,訊息整合至Dashboard
5.Calendar: 個人行事曆與小組行事曆,可做會議邀請設定,訊息整合至Dashboard
6.Wiki: Wiki-like文件中心
7.Polls: 簡易的問卷投票功能
8.Messages: 內部訊息平台,取代email功能
9.Custom Page: 可以加入不同的網頁/AP


[Excel VBA] 消失的快捷鍵,用VBA補回來!

因為工作的需要,常常幫公司同仁撰寫 Excel 巨集程式,方便他們處理資料

也為了簡化操作,所以設定快捷鍵讓他們可以一鍵執行巨集(例如:Ctrl+u)
(註:原 Ctrl+u 鍵是幫文字加底線)

在 Excel 2003 的時候,只要將巨集安全性設為中,告訴使用者打開 Excel 檔時,啟用巨集
這樣執行起來都沒什麼問題

但到了 Excel 2007 & 2010 的版本,對於 Excel 巨集的控制嚴格了,很多原來可以使用的功能,通通不行了。即使信任文件,告訴使用者要啟用內容,快捷鍵還是常常會不見了!

試了很久,找不出問題,有的人的電腦可以,但有的人的不行,總不能一個一個去幫他們調吧!所以乾脆,在程式中強制按鍵的設定

  1. Private Sub Workbook_Open()  
  2.   
  3.   Application.OnKey "^u", "doUpdate"  
  4.   Application.OnKey "^r", "doRefresh"    
  5.   
  6. End Sub  

這樣就不用傷腦筋了!

[Agentflow開發記事]--為 Agentflow 3.5 Portal 加入免費的投票機

今天在 Google+ 上看到 freeGROUP 免費資源網路社群介紹 Pollfu 免費投票網站產生器。

Modern UI 的網站介面,以及簡易的操作就可以快速產生一個投票機,想說最近在公司發 mail 詢問 MSN 歇業的問卷,放網站上也許更容易收集結果。

於是測試了一下,就把它擺到公司的 Portal 上使用。

Pollfu 產生投票機的方式很簡單,這邊就不多贅述,只是要把它擺到 Agent Portal 就必須了解一下作法了。

Agentflow 3.5 的 Portal 是採用 Porlet 的方式組成的。首先,要打開 aepp-memu-config.xml 這個檔案,路徑位於 Webagenda/WEB-INF/conf 底下。


  1. <page aclClass="" id="defaultPage" image="" title="default.page"  
  2.       url="/index.do" visible="false">
  3.   <acl-edit />
  4.   <acl-view />
  5.   <column visible="true" width="80">  
  6.     .....  
  7.   </column>  
  8. </page>


找到 page 這個 tag,defaultPage 就是首頁,底下的 column tag 就是首頁的版面配置(用 administrator 登入後調整版面所看到的),把


  1. <pagePart border="false" enabled="true" encoding="UTF-8"  
  2.           height="-1" id="msn" iframe="false" moduleId=""  
  3.           title="Survey" url="/pollfu.html" visible="true">  
  4.   <edit-mode target="" url="" />  
  5.   <acl-edit />  
  6.   <acl-view />  
  7. </pagePart>  


加在要顯示的 column 版面,然後新增一個 pollfu.html 的網頁在 WebAgenda 目錄下,加入這一段 javascript


  1. <script src="http://pollfu.com/public/js/embed.v1.js" data-id="X"></script> 


對!就這麼簡單的一行程式...(請從 pollfu 的網站產生 embeded code)

這樣就大功告成了!


[Google Apps]--My First Google Apps Script

最近看到 Google Apps 推出 Google Apps Script 可以用來整合 Google Drive 資源,腦海中頓時有了出現救世主了的想法。

Google Apps 有多強大,這就不用我在此贅述,Google 一下大概就知道了。

其實要說 Google Apps 可以完全取代 微軟 的 Office,還言之過早。畢竟到目前為止,除了 Kingsoft Office Suit 相容性比較高之外,其他版本的 Office 可以說用「慘」一個字來形容。更何況是雲端的 Office。不過,話說回來,雲端 Office 本來就不是要來取代桌面 Office 的,他只是提供一種便利的服務,讓你隨時隨地可以取用文件,並進行分享與協同運作。

但未來,當這樣的形態成了大家共同的作業模式,你就不能輕忽他會帶來的影響性了。

OK,進入正題,我為什麼要寫 Google Apps Script?

主要是我想了解 Google Apps 的整合運用,當我們在雲端建構好呈現的介面,透過 JSON 資料傳輸技術,我們就可以很容易的將企業內的資料(或者雲端上的資料)呈現到外部環境(當然,假設安全條件無虞的情況下),而不需要花大錢去建構一整套系統來達成這個運用,更不用說還要考慮後續 Maintain 的所有事情(理想狀況)。

怎麼開始呢?

連到這個網址 https://developers.google.com/apps-script/ 按一下 Get Started 這個按鈕。
所有說明文件與範例都在上面,照著步驟一個一個做,其實不難。

問題是要做什麼運用?

Office 最強的地方在哪裡?其實不在編輯文字或做出很漂亮的簡報、文件,而是企業內部強大的應用,Excel + VBA。

Google Apps 中加入了 Google Apps Script,那就等於整個 Google Apps 平台,都可以讓你使用,用多少付多少,這就是重點了。

所以我的想法很簡單,我怎麼樣在 Googls Sheets 中重現我在 Excel 中所做的事,請往下看。

我之前幫老婆寫了一支排座位的程式,可以用來排班級座位,每次段考/小考,就可以要學生依座位表的內容就座,就是要防止作弊啦!


按一下講桌,就可以重新產生一張座位表,很方便。

所以,起手式,就用這一支來實作看看吧!

首先進入 Google Drive,建立一張試算表,將格子拉一拉.....還真難拉 T_T


而且還沒有框線!(還是我找不到?)所以就用顏色標示區隔。其實用熟了,拉表格也還蠻快的,但就是有點彆扭。(Google加油蛤!)

接下來,在工具下拉,選指令碼編輯器


第一次產生,他會要你選擇要產生哪一類型的 Script,選試算表那一個。

接著就會產生一個 程式碼.gs 的頁面以及範例程式。

接下來,就開始寫程式吧!(不用想太多,就跟寫 Macro 一樣)


  1. function setSeat(){  
  2.   var iCol;  
  3.   var iRow;  
  4.   var sheetApp = SpreadsheetApp.getActiveSpreadsheet();  
  5.   Logger.log('讀取座位表');  
  6.   var sheet1=sheetApp.getSheetByName('座位表');  
  7.   Logger.log('參數設定');  
  8.   var sheet2=sheetApp.getSheetByName('參數設定');  
  9.     
  10.   iCol = sheet2.getRange(1,2).getValue();  
  11.   iRow = sheet2.getRange(2,2).getValue();  
  12.       
  13.   var a=[];  
  14.   var i, j, k;  
  15.   var seed;  
  16.   var iFix, iCount, iStart  
  17.   var i1  
  18.       
  19.   iFix = sheet2.getRange(3,2).getValue();  
  20.   iStart = 0;  
  21.     
  22.   var startrow = 8;  
  23.   var startcol = 2;  
  24.   
  25.     
  26.   //Randomize    ' 對亂數產生器做初始化的動作。  
  27.   
  28.   for (iCount = 1;iCount<=iFix + 1;iCount++){  
  29.     i1 = sheet2.getRange(3 + iCount,2).getValue();  
  30.     for (i=iStart+1;i<=i1;i++){             
  31.       a[i] = getSeed(a,i1);  
  32.     } //i  
  33.     iStart = i - 1;  
  34.   } //iCount  
  35.     
  36.   k = 1;  
  37.   for (i = 1;i<=iRow;i++){  
  38.     for (j = iCol;j>=1;j--){  
  39.       sheet1.getRange(startrow + (i - 1) * 2, startcol + (j - 1) * 2).setValue(a[k]);  
  40.       k++;  
  41.     } //j  
  42.   } //i  
  43. }  
  44.   
  45. function getSeed(a,i){  
  46.   var seed = Math.floor(Math.random()*i)+1;    // 產生 1 到 36 之間的亂數值。  
  47.   for (var j = 1;j<=i;j++){  
  48.     if (seed == a[j]){  
  49.       seed = getSeed(a,i);  
  50.     }  
  51.   }  
  52.   return seed;  
  53. }  


我把主要要產生座位編排的程式,寫在 setSeat() 這個 function 中,SpreadsheetApp 是內建的物件,透過它可以取得試算表的控制權。

我將一些參數寫在 參數設定 這個 Sheet 中,如果要改變規則(例如:人數增減,座位增加等),就讓老婆自己修改,改一下座位表的版面即可。(要知道,當程式寫得不夠彈性時,會有奪命連環Call)

程式很簡單,就是藉由亂數產生不重複的編號,丟進去 Array 中,再 Dump 到工作表的相關位置上。程式碼從 VBA 移植過來,沒有花太多時間,主要是在 Excel Object Model Mapping 到 Google Sheets Object Model 的熟悉程度,還好 Google Apps Script 的編輯器,已經有 Code Insight 的功能,要了解並不困難。


OK,程式寫完了.....啊...怎麼執行啊?

Google Apps Script 的 IDE 有執行 & Debug 的功能


選取後,執行就可以馬上知道結果


瞧,跟 Excel 執行的結果沒兩樣呢!那麼就把 講桌 的 Button 加上去吧....噫?竟然沒有!

這麼不 Friendly,User 怎麼知道要去選工具,選指令碼管理員,選要執行的程式,這樣使用經驗會很糟糕吧!

研究了一下,看來只能用圖形的方式來做了,用插入 | 繪圖 的方式,自己做一個 Button 的圖形擺上去,其實這裡很方便的就提供您指定指令碼的功能


把它指派好 setSeat 這樣這個圖形就有執行程式的功能了


此程式已設定為共用,請參考以下連結

https://docs.google.com/spreadsheet/ccc?key=0AiEO0LGS-8xNdGpMVnVDejNMdWJJbzFzbEgxc3Fta2c

附記1:原本以為在 iPad 上也可以使用,結果 Script 無法在 iOS 上執行,可惜

附記2:要能夠執行 Script,還不是那麼簡單勒...要一大堆設定...還在 Try 當中,不過可以看到協同運作的功能了,一個開啟的使用者改變了 Sheets 內容,其他開啟的使用者的內容也會跟著更新

[Agentflow開發記事]--WFCI 與 自訂表單的相遇

上週跑去新竹華苓上了 Agentflow AF3-4 (System Integration and Customization with Agentflow)的課程,上完了直覺的值回票價,比你在 Agentflow Forum 中大海撈針來的有用許多!(建議AF3-2 & AF3-4都要上過)


要進行整合,可以使用的方式有三種

1. 自訂表單
2. WFCI
3. Web Services
第一種方式較為單純,就是提供一組 script 嵌入原本的 Web App。透過流程設定的自訂文件,在簽核時,將表單 redirect 到您的 Web App,同時將流程所使用的參數透過 Form 的包裹方式,Post到您的Web App,讓您的 Web App 可以使用,算起來是最為便利的,也是最快的方式,但是就受限於表單的資料定義項目以及所提供的 Web 參數,同時只能從WebAgenda去啟動流程,在整合度上相對受到限制。
第二種方式,是一組完整的API讓您的程式可以直接跟Agentflow(PASE Server)溝通,同時可以完全客製出您的Client端(相對於Agentflow Portal),但缺點是只支援Java Program(Java AP & JSP),如果要讓 .Net App使用,則必須透過 .Net Java Plug-In(iKVM.Net)將 jar 檔轉換成 dll 讓 .Net 使用。
第三種方式,則是Follow標準的Web Service作法,由Agentflow所提供的 Web Services來跟Agentflow溝通(設定方式詳見上一篇),走的是標準的SOAP協定,所以在效能上會大打折扣(當然,這得視您要傳輸的資料量大小有關)。
這邊有一個觀念,必須先釐清楚:以前在開發Notes Workflow AP時,常聽到的說法就是Notes的Workflow是屬於Form Based的流程引擎(Agentflow在流程設計上如果照字面來看,某種程度上也算是,因為一定需要提供一個表單,但是把它當作流程所需使用資訊的Table即可);也就是說,流程必須綁住表單,流程的資料都來自於表單(這種說法,基本上是對的),所以流程無法與表單抽離…這樣的說法基本上是一種謬誤!如果我們將流程需使用的表單,當做是流程資料的承載,將使用者實際面對的表單,當做是資料的展現,這樣我就可以將使用者表單與流程抽離,我的使用者表單負責的是要呈現給使用者的資訊,當我需要跑流程的時候,我再透過呼叫流程API的方式,將流程會使用到的資料寫入流程使用的表單,讓流程知道怎麼跑像下一關即可,我的使用者表單根本不需要管流程怎麼跑,這也是當初我拿Lotus Workflow當做流程引擎,用網頁來設計使用者表單的概念(這中間使用到一些AJAX的技巧,請搜尋一下本網誌 Domino主題)。

那到底要怎麼使用才會比較合適呢?如果我是.Net的開發者,是不是會很困難?不像Java 開發那樣擁有較多的Resource?
基本上,我是把Web Service先排除掉了,因為設定上比較麻煩,中間多走了一層Protocol,但是我如果完全要透過WFCI重寫,那麼我舊的AP又都沒辦法使用,等於是浪費人力與時間成本,但是使用自訂表單,又只能從WebAgenda去跑流程…該怎麼處理呢?
於是答案都在影片中….XD
前面我們提過,WFCI只支援Java/JSP,其實我需要的是由外部的程式啟動流程,然後使用者可以在WebAgenda中去簽核表單,也可以追蹤表單,也就是說由WenAgenda來幫我管理簽核流程。要達到這樣的功能,又不想重寫程式,那我們就需要透過自訂表單的協助,同時由WFCI來啟動流程…可是我的程式是 .Net開發的,怎麼去呼叫WFCI啊!
答案在JSP!(當然你也可以用Web Services)
我們可以寫一支JSP程式,專門用來讓外部程式啟動流程。(當然這是上課的教材Copy過來改的)
外部的程式只要將要啟動的流程ID,啟動流程的使用者,以及要傳給自訂表單的參數包裹成HTTP Form Data POST給 initProcess.jsp即可啟動流程。


底下,就為您示範如何在 Web App 中將 CustForm中所定義的資料欄位包裹起來,POST到 initProcess.jsp 透過 WFCI 來啟動 Agentflow 中的流程。

InitProcess.aspx.vb
  1. Imports System
  2. Imports System.Collections.Generic
  3. Imports System.Text
  4. Imports System.Net
  5. Imports System.Collections.Specialized
  6. Imports System.IO
  7. Partial Class Forms_HttpRpc_frmDCInitProcess
  8. Inherits System.Web.UI.Page
  9. Protected Sub Page_Load(ByVal sender As Object, ByVal e As System.EventArgs) Handles Me.Load
  10. Dim httpPost As HttpPostCallWebSite = New HttpPostCallWebSite()
  11. Dim keyValuePair As NameValueCollection = New NameValueCollection()
  12. keyValuePair.Add("processID", "PRO00431303438269342") ' 流程 ID
  13. keyValuePair.Add("userID", Request("wm_id")) ' 啟動流程的人員 ID
  14. keyValuePair.Add("pm_id", Request("pm_id")) ' CustForm 定義的表單欄位
  15. keyValuePair.Add("csr_id", Request("csr_id")) ' CustForm 定義的表單欄位
  16. keyValuePair.Add("wm_id", Request("wm_id")) ' CustForm 定義的表單欄位
  17. keyValuePair.Add("PB_NO", Request("PB_NO")) ' CustForm 定義的表單欄位
  18. Dim url As String = "http://localhost:8080/WebAgenda/initProcess.jsp"
  19. Dim result As String = httpPost.RequestHttpPost(url, keyValuePair)
  20. Response.Write(result)
  21. End Sub
  22. End Class

  23. ' POST data class
  24. Public Class HttpPostCallWebSite
  25. Inherits System.Web.UI.Page
  26. Public Function RequestHttpPost(ByVal webUrl As String, ByVal keyValuePair As NameValueCollection) As String
  27. Dim ret As String
  28. ' Create a request using a URL that can receive a post.
  29. Dim request As WebRequest = WebRequest.Create(webUrl)
  30. ' Set the Method property of the request to POST.
  31. request.Method = "POST"
  32. 'Set Http Post Params
  33. Dim strParams As String = ""
  34. Try
  35. Dim i As Integer
  36. For i = 0 To keyValuePair.Count - 1
  37. strParams += keyValuePair.GetKey(i) + "=" + keyValuePair.Get(i) + "&"
  38. Next i
  39. strParams = IIf(Right(strParams, 1).Equals("&"), Left(strParams, Len(strParams) - 1), strParams)
  40. ' Create POST data and convert it to a byte array.
  41. Dim byteArray As Byte() = Encoding.UTF8.GetBytes(strParams)
  42. ' Set the ContentType property of the WebRequest.
  43. request.ContentType = "application/x-www-form-urlencoded"
  44. ' Set the ContentLength property of the WebRequest.
  45. request.ContentLength = byteArray.Length
  46. ' Get the request stream.
  47. Dim dataStream As Stream = request.GetRequestStream()
  48. ' Write the data to the request stream.
  49. dataStream.Write(byteArray, 0, byteArray.Length)
  50. ' Close the Stream object.
  51. dataStream.Close()
  52. ' Get the response.
  53. Dim response As WebResponse = request.GetResponse()
  54. ' Display the status.
  55. ret = CType(response, HttpWebResponse).StatusDescription
  56. ' Get the stream containing content returned by the server.
  57. dataStream = response.GetResponseStream()
  58. ' Open the stream using a StreamReader for easy access.
  59. Dim reader As New StreamReader(dataStream)
  60. ' Read the content.
  61. Dim responseFromServer As String = reader.ReadToEnd()
  62. ' Clean up the streams.
  63. reader.Close()
  64. dataStream.Close()
  65. response.Close()
  66. Return ret & " " & responseFromServer
  67. Catch ex As Exception
  68. Return "Para:" & strParams & ex.Message
  69. End Try
  70. End Function
  71. End Class
上面這支AP就是我們外部程式,透過 WebRequest 這個Class來呼叫啟動流程的 jsp 程式。接下來,我們就來看 initProcess.jsp 該如何撰寫。

initProcess.jsp
  1. <%@ page language="java" contentType="text/html;charset=UTF-8" %>
  2. <%@ page import="java.io.*,java.util.*,
  3. java.util.HashMap,
  4. java.util.Vector,
  5. si.wfinterface.WFCI,
  6. si.wfcidata.WFCIException,
  7. si.WFCIFactory,
  8. pe.pase.MemberRecord,
  9. pe.pase.Role,
  10. pe.pase.DBProcess,
  11. pe.pase.Task,
  12. pe.pase.PASEartInstance" %>
  13. <%
  14. String PASE_IP = "localhost";
  15. String PASE_PORT = "1099";
  16. WFCI wfci = null;
  17. String processID="";
  18. String userID="";
  19. //wfci = WebSystem.getWFCI();
  20. //if (wfci==null) {
  21. try {
  22. wfci = WFCIFactory.createWFCIRMIImpl();
  23. if (wfci.connectServer(PASE_IP, PASE_PORT) == -1) {
  24. throw new Exception("can't connect Flow Server: host=" + PASE_IP + " Port=" + PASE_PORT);
  25. }
  26. HashMap dataMap = new HashMap(); //傳送資料
  27. // 接收傳進來的 Form data
  28. Enumeration paramNames = request.getParameterNames();
  29. while(paramNames.hasMoreElements()) {
  30. String paramName = (String)paramNames.nextElement();
  31. out.print("" + paramName + "\n");
  32. String paramValue = request.getParameter(paramName);
  33. out.println(" " + paramValue + "\n");
  34. if ("processID".equals(paramName)){
  35. processID=paramValue;
  36. } else if ("userID".equals(paramName)){
  37. userID=paramValue;
  38. } else {
  39. dataMap.put(paramName,paramValue);
  40. }
  41. }
  42. //取得人員相關資料
  43. MemberRecord MR = wfci.getMember(userID);
  44. if (MR != null){
  45. String userName = MR.getName();
  46. //取得人員職務相關資料
  47. String roleID = MR.getMainRoleID();
  48. Role userRole = wfci.getRole(roleID);
  49. String roleName = userRole.getName();
  50. out.println("createProcess from UserName:"+userName+"useRoleName:"+roleName);
  51. //取得流程相關資料
  52. DBProcess DBp = wfci.getDBProcess(processID);
  53. if (DBp != null){
  54. out.println("createPrcoessName :"+DBp.getName());
  55. }
  56. //createProcess return RootTask
  57. String taskID = wfci.createProcess(userID,processID,dataMap,false);
  58. if (taskID != null){
  59. out.println("createProcess success!!");
  60. Task rootTask = wfci.getTask(taskID);
  61. out.println("rootTask Type is :"+rootTask.getTaskType());
  62. String rootProcessID = rootTask.getProcessID();
  63. DBProcess rootProcess = wfci.getDBProcess(rootProcessID);
  64. out.println("rootTask proceeName:"+rootProcess.getName());
  65. }
  66. }else{
  67. out.println("can't get "+userID+" MemberRecoed");
  68. }
  69. }catch(WFCIException e){
  70. out.println("catch wfci throws Exception : "+e);
  71. e.printStackTrace();
  72. }catch(Exception e){
  73. out.println("catch Exception : "+e);
  74. e.printStackTrace();
  75. }finally{
  76. //must disconnect
  77. if (wfci != null)
  78. wfci.disconnectServer();
  79. }
  80. //}
  81. %>

粗體字的部份,就是呼叫 WFCI 啟動流程的重點,Form data 的接收,透過
Enumeration paramNames = request.getParameterNames();
可以將資料一個一個取出來,再組成 HashMap丟到流程裡。
這樣我們就把流程啟動了!(得意)
噫?沒動靜!

對!少了一個步驟,流程必須知道你送過來的資料是什麼,才能夠把資料存到 CustForm 定義的資料欄位裡面!

所以我們在第一個關卡的 PreAction 這個 Script 區塊中,要加上底下這一段程式碼
  1. var hm = Server.getGlobals(MyTask.getRootID());
  2. var Artins = MyTask.getArtInstance();
  3. var pm_id = hm.get("pm_id");
  4. var csr_id = hm.get("csr_id");
  5. var wm_id = hm.get("wm_id");
  6. var PB_NO = hm.get("PB_NO");
  7. Artins.setAppValue("pm_id",pm_id);
  8. Artins.setAppValue("csr_id",csr_id);
  9. Artins.setAppValue("wm_id",wm_id);
  10. Artins.setAppValue("PB_NO",PB_NO);
  11. //Artins.setAppValue("pm_id",hm.get("pm_id"));
  12. java.lang.System.out.println("======== pm_id:"+pm_id);
  13. java.lang.System.out.println("======== csr_id:"+csr_id);
  14. java.lang.System.out.println("======== wm_id:"+wm_id);
  15. java.lang.System.out.println("======== PB_NO:"+PB_NO);
這樣就能夠啟動流程並與舊有的 AP 結合使用了!(請參考 AF3-4 講義中的作法,底下的程式碼,因為顯示的問題所以加上了一些空格讓程式碼可以顯示完整)
  1. < script src="<%=Request("eform.web.url") %>/eform/customform.js" type="text/javascript" >< /script >
  2. < form id="eForm" action="<%=Request("eform.web.url") %>/custForm.do" method="post" >
  3. < input name="eform.method" type="hidden" value="suspend" / >
  4. < input name="eform.taskId" type="hidden" value="<%=Request("eform.taskId")%>" / >
  5. < input name="pb_no" type="hidden" value="<%=Request("pb_no")%>" / >
  6. < /form >